
I remember it like it was yesterday. I was helping mum to prepare dinner and she had gone outside to get something from the garden. I had peeled the carrot and I had just started cutting the carrot into slices. The knife slipped and my finger got in the way. There was blood and lots of it. Upon reflection, I knew I wasn’t holding the knife very well as I had my fingers out straight rather than tucked underneath. It was a good lesson that I remember even now, when cutting carrots!
My 3-year-old son loves to help in the kitchen too and knives are a common feature. He has used knives many times before but recently I decided to run through a full knife progression with him in preparation for his 4th birthday. I want to give him his very own pocket knife as a present. He doesn’t know this yet, but I just wanted to make sure that I had covered everything so he is feeling confident when he gets his own knife and that he understands that it is not a toy. I want him to know that it is a tool that I trust him with. I trust in his ability to assess the risk, to use it properly, to ask for help if he needs it and to know that he needs an adult supervising always for his age.
Here is what I have done with my son and I am aware there are many ways to do this. I have chosen this way as when he gets his knife he will probably be given a pile of sticks to start whittling so the movement of the peeler helps mimic the whittling of a stick.
Photos to come!!!!
Peeler:
- Name the parts of the peeler pointing out the handle and the blade.
- Notice that the blade can cut both ways e.g. towards you and away from you.
- When teaching a child to use a peeler it is best to teach peeling away from your body. This can seem strange to an adult as most adults have ended up peeling towards them. Depending on the age of the child you might feel that they would be fine to peel towards them.
- Encourage a strong grip on the peeler, use other hand to grip the carrot at the top
- rest the end of the carrot on the bench, start with blade just under the top hand and strike down towards the bench with even speed.
- Rotate carrot slightly with holding hand and continue till all the skin is taking off the carrot
Kitchen knife:
Choosing a knife is very important. I know that we don’t want our children to cut themselves so it might be tempting to get a plastic knife or a cutlery knife. I recommend a sharp kitchen knife so that it’s easy to cut the vegetable. A knife that is blunt or not very sharp will make it hard for the child to cut the vegetable and can increase the chance of the knife slipping and possibly them cutting themselves.
- Name the parts of the knife pointing out the handle, the blade and the top of the blade.
- Explain that the knife hand should be closed around the handle. The strongest grip has the thumb wrapped over the closed fingers.
- Practice placing the tip of the knife on the chopping board, then bring the rest of the blade down to the board. Its nearly like a rocking motion. If the knife is not sharp enough (or in some instances if the vegetable is just hard to cut like a kumera), you will see the child starting to try and saw the vegetable. Its best to prevent this as when a child starts sawing they are putting themselves more at risk of getting cut.
- Teach spider fingers for the vegetable holding hand. This is where the fingers are in a more vertical position so that if the knife comes down on the fingers it will most likely run down the flat of the finger/s and cut through the vegetable rather than their fingers.
- Time to introduce the vegetable! A courgette sliced in half length ways is a great first vegetable because it’s soft and easy to cut which helps build their confidence.
- Place the half cut courgette on the chopping board and get the vegetable holding hand in the position of spider fingers. Once the spider hand is in place, the knife hand places the tip of the knife on the board behind the courgette and lowers the knife down through the courgette at a constant speed. This process is continued as required.
- If the vegetable or fruit is hard to cut it is possible for the spider hand to be placed on top of the blade in the high 5 hand position and gently press down. At this stage it is good to talk about why our fingers shouldn’t curl under the blade of the knife and what would happen if they did.
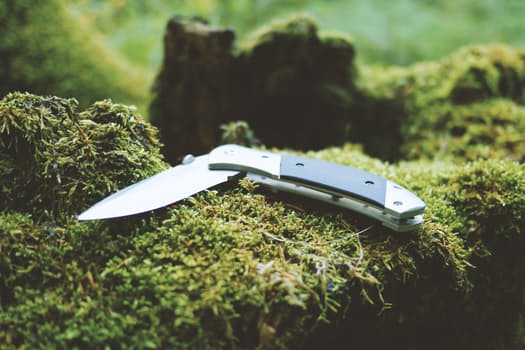
The Pocket Knife:
- Introduce the knife including the blade and how it locks in place. Show how to check that the blade has locked into place and demonstrate what happens if the blade isn’t locked into place / show what it looks like
- Show the knife grip with fingers and thumb wrapped around the handle
- Head outside and get a good stick to practice some whittling
- Sit on a log or something that doesn’t matter getting knife marks in it
- Get the stick holding hand to rest the bottom of the stick on a log to the side of you, or alternatively you could be sitting on the ground with legs wide apart (I feel this would be a better position when a child is a bit older so I prefer to use the sitting on a log with the stick to the side for this age group)
- Place the blade on the right angle below the stick holding hand
- Strike the knife down and away aiming to peel off the outer layer of bark